Step-by-Step Guide to Adding Products on Amazon Seller Central
Do you want to learn how to add your products to Amazon Seller Central efficiently, but the complexity of it leaves you feeling overwhelmed? Rest assured, you’ve come to the right place!
If you’re unfamiliar with Amazon Seller Central, listing products on it may seem a bit challenging. Creating a successful presence on Amazon begins with accurately adding your products to the platform. This comprehensive guide will walk you through the step-by-step process of listing products on Amazon Seller Central.
Amazon Product Listing Options
———————————–
Depending on the type of products you’re selling, you can choose between two different Amazon listing formats.
Reselling existing products
If you’re in the business of reselling goods, whether through wholesale or online arbitrage, you’re dealing with products that have already been listed on Amazon. The marketplace discourages the creation of duplicate listings. It’s essential to refrain from creating new listings for products that are already available for sale. Your product can be showcased on the listing that other sellers use.
Introducing new products or private-label items
When introducing a new product, the first step is to sign up for an Amazon Seller account. Note that this step is essential even when you wish to sell existing items. To get started, go to sellercenteramazon.com and sign up for an account. You can choose between two types of selling plans: Individual and Professional. The second option is better suited for corporations with larger inventories. Once you’ve set up your seller account, you can list your products.
How to add products to an existing Amazon account
———————————–
Visit Amazon Seller Central and log in with your Amazon Seller credentials. From here, follow the steps below.
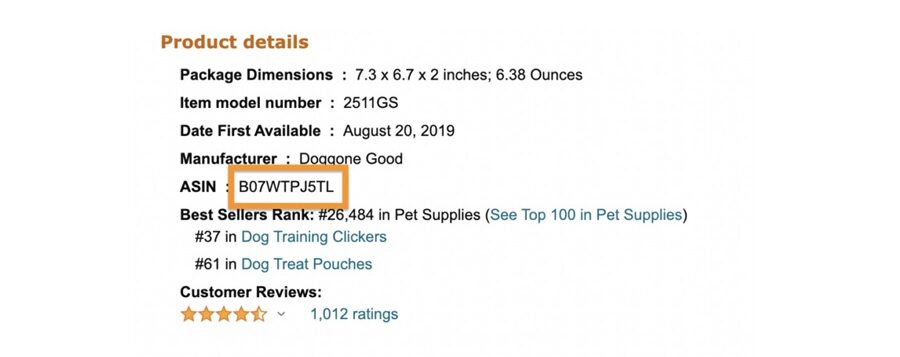
Step 1: Obtain the ASIN
The first step in selling a product on Amazon is to get its unique Amazon Standard Identification Number (ASIN). This is either included in the listing’s URL or listed under “Product Details” on the Amazon website. It is important to verify that the right product variant is being used when selling products with multiple variations.
 Step 2: Add the product
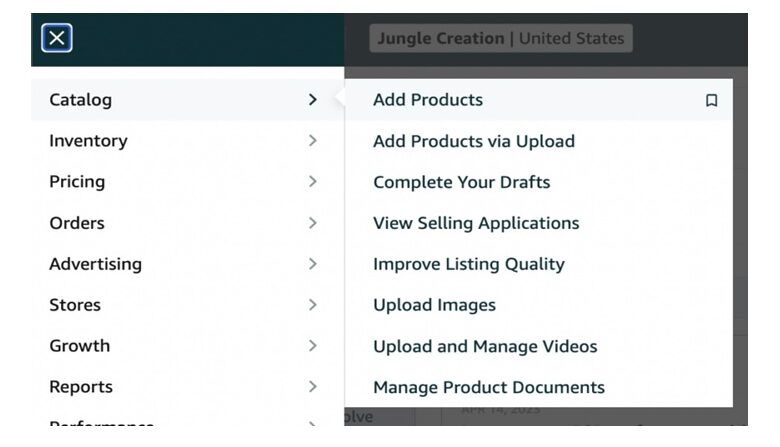
Navigate to the “Catalog” section within your Seller Central account. Inside the Catalog, select “Add Products.”
After selecting “Add Products,” you’ll need to type the ASIN into the search box to find your products in Amazon’s catalog.
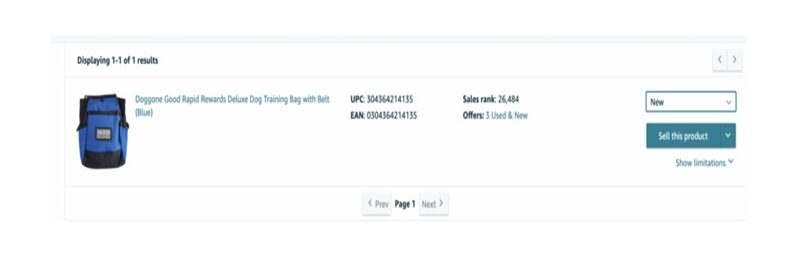 Step 3: Specify product condition
Include information on the condition of the product you are selling. Mention whether it is new, used, or refurbished. After that, select the option to “Sell this product.”
Step 4: Make your offer
Make a Fulfilment Channel selection, either Merchant Fulfilled (FBM) or Fulfilment by Amazon. After this, set your standard selling price. If you choose Merchant Fulfilled from the drop-down menu, a new menu item will appear, prompting you to enter the quantity of the items you have. By selecting FBA, Amazon’s website will direct you to the page where you can create an FBA shipment.
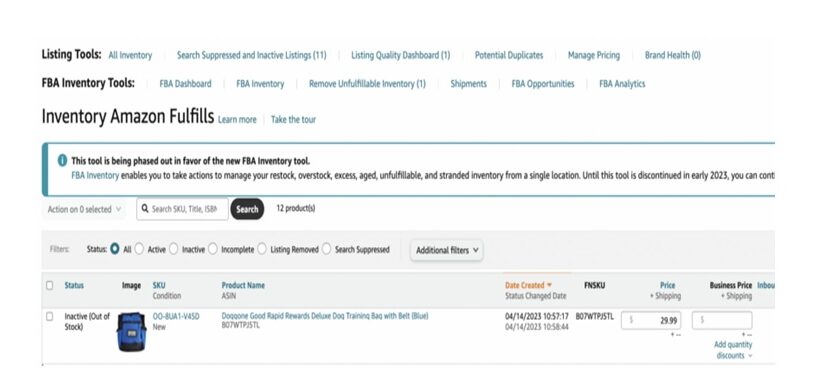
Note: Your listing will become active once your inventory is received by Amazon.
After entering your details, select ‘Save and finish’ to confirm your listing. Your listing will now be available in the ‘Manage Inventory’ section of Seller Central.
 How to create a new product listing on Amazon
———————————–
Creating a new product listing on Amazon involves a series of steps.
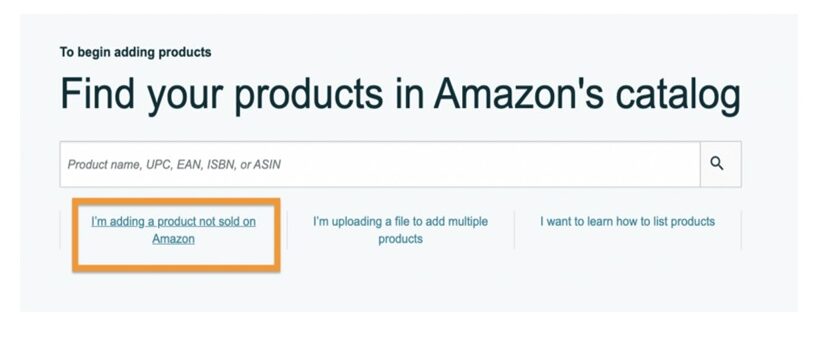
Step 1: Click “Add a Product” in Seller Central
Under “Add a Product,” choose “I’m adding a product not sold on Amazon.”
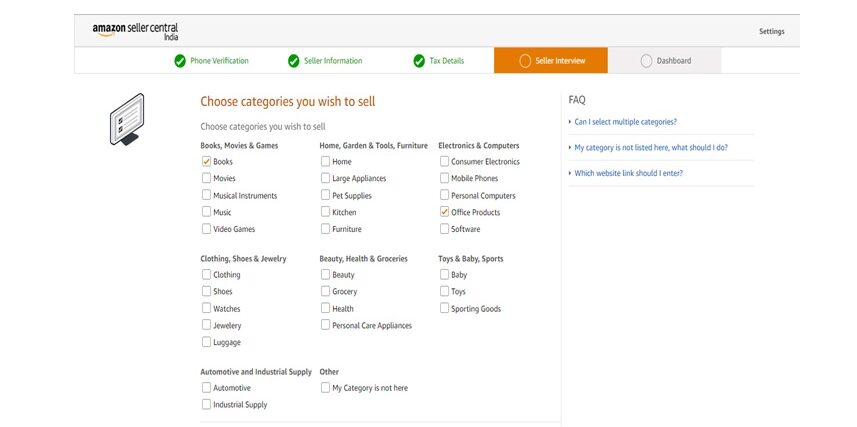
 Step 2: Choose a product category
Select the most appropriate category for your product. By doing this, you help Amazon identify your product type, and it allows Amazon to provide you with the most relevant data fields for entering information.
 Step 3: Add product information
The listing information is divided into eight tabs, including product identity, vital info, offer, product details, variations, images, and keywords. These tabs cover critical aspects of creating a comprehensive product listing on Amazon. Here’s a breakdown of what each step entails:
- Product identity: Ensure you use a global standard 1 (GS1)-issued product identification like a UPC barcode. Amazon will check the accuracy of your UPC with GS1 to guarantee that it is legitimate before accepting it.
- Vital info: Specify essential details such as quantity, price, condition, and fulfillment method. You can choose between “Fulfilled by Amazon” (FBA) or “Merchant Fulfilled” (FBM).
- Product details: Provide comprehensive information about your product.
- Variations: If you’re selling multiple variations of the same product (e.g., different colors or sizes), use the variations tab to fill in the details for each variation.
- Images: Add multiple high-quality images showcasing your product from various angles. Follow Amazon’s image guidelines.
- Keywords: Compile relevant keywords with good search volume for your listing that can boost your product’s visibility. Put yourself in the customer’s shoes and think about what keywords they would use to search for your product on Amazon.
Step 4: Review and confirm
Double-check all the information you’ve provided for accuracy and completeness. To complete creating your new product listing, select the “Save and Finish” or “Publish” option.
After successfully creating your new product listing, you can manage it through your Seller Central account. You can monitor inventory levels, update product details, and adjust pricing as needed.
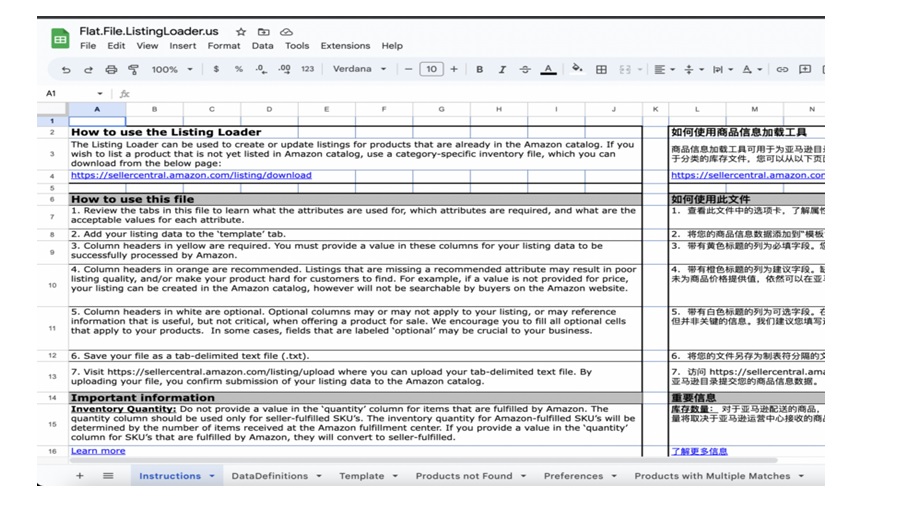
How to add products via upload
———————————–
With the use of a spreadsheet, the listing can be created easily via entering several products at the same time. However, one should only opt for this approach when they are well-versed in the processes and usability of Amazon Seller Central.
To upload multiple products in bulk, you should select the ‘add products via upload’ button.
You can access this option from the Seller Central main page by following these steps:
- Log in to your Seller Central account.
- From the home page, go to the ‘Inventory’ tab in the top navigation menu.
- Under the ‘Inventory’ tab, select ‘Add Products via Upload.’
This option is particularly valuable for business models like Amazon dropshipping and retail arbitrage, where you often need to list numerous products efficiently.
 To start uploading your products in bulk, continue with the following steps:
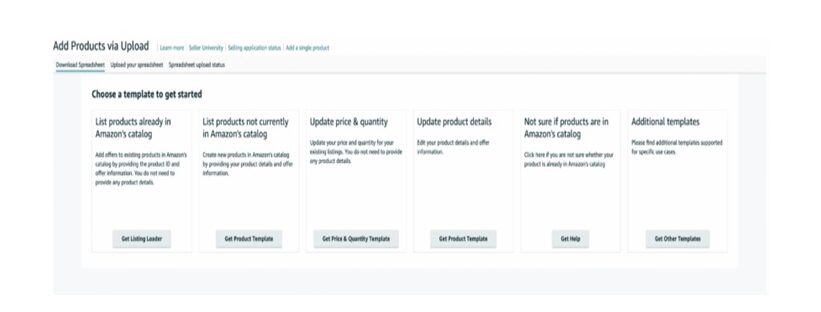
Step 1: Follow the steps provided by Amazon
Choose a template to begin the product upload process. Select the marketplace for which you need a spreadsheet and download the template.
 Step 2: Select a spreadsheet program to use the template
- Open the downloaded template in a spreadsheet program like Excel.
- The template includes multiple tabs with instructions, definitions, and so on.
- Carefully read the instructions and refer to Amazon’s example templates if needed, especially for columns you find challenging to fill.
- Enter all your product information into the spreadsheet template.
 Step 3: Add your file to Amazon Seller Central
- After completing the spreadsheet, download the file.
- To do this, head back to the part of Seller Central from which you first created the template.
- Choose “Upload your inventory file” at the top of the page.
- Upload the downloaded file for the processing of your spreadsheet to begin.
- The uploading process could take some time. To be notified when the upload is finished, you can provide your email ID.
- To know the uploading status, go to the “Spreadsheet upload status” tab.
- If required, Amazon will provide you with a guideline for fixing any errors in your file.
Get help with professional Amazon listing services
———————————–
Managing Amazon listings, especially in bulk, can be a daunting task. That’s where professional Amazon listing services come into play. When you partner with experts in Amazon bulk product upload and Amazon listing service, you gain a competitive edge. Amazon has strict rules and guidelines in place. These professionals understand the intricacies of Amazon’s platform and its algorithms, which ensure that your listings are not only accurate but also highly visible to potential customers. They meticulously handle the steps of product data entry, leaving you with more time to focus on growing your business.
Wrapping up
Once you’re familiar with the process, carrying out the task of Amazon product listing is a breeze. Following the steps in this article should make you an expert at listing products on Amazon Seller Central, regardless of your business niche on Amazon.