How to Set WooCommerce to Redirect After Login or Logout Based on Role?

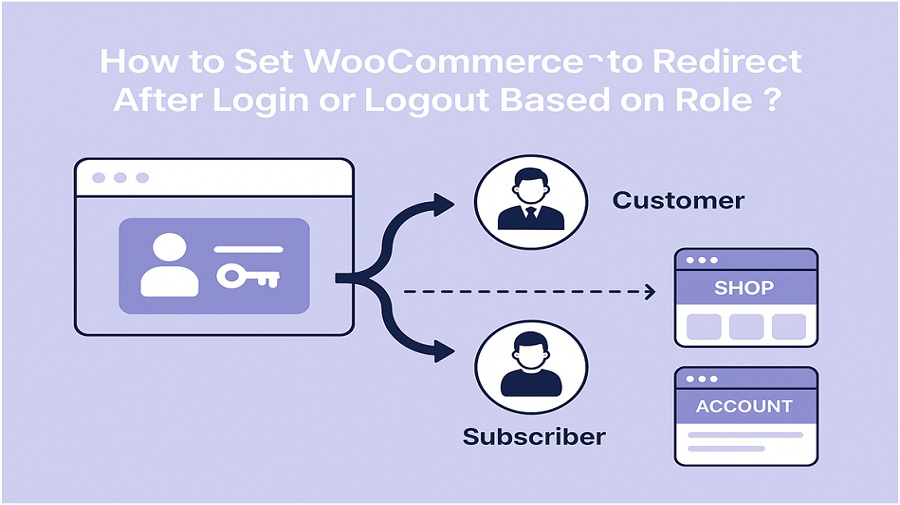
Redirecting users based on their role in WooCommerce isn’t just useful. It’s important if you want to control how different users interact with your store. Instead of sending everyone to the My Account page, you can send customers, shop managers, or any role to different pages. That way you guide them where you want them to go right after login or logout.
The default behavior of WooCommerce doesn’t support role-based redirects. You’ll need a plugin to do that. One that gives you control over login, logout, and registration redirects. The WooCommerce redirect after login plugin gives you this function. It lets you redirect users by role, or even by name, and send them to any page you choose.
Once the plugin is installed, you can create rules. These rules let you choose what role gets redirected where. For example, customers can go to the Shop page after login. Your editors can go to the dashboard. And you can choose a totally different page for logout.
This kind of redirect helps stores that manage multiple types of users. If you run a vendor marketplace or subscription store, it’s even more important. You don’t want every user seeing the same landing page after login. That causes confusion and wastes time.
Setting it up doesn’t take long. You go to the plugin settings, add a new rule, pick the user role, and assign a URL. That’s it. Each rule can also be turned on or off depending on what you need. And you can create as many rules as required.
With the redirect after login WooCommerce feature, you’re not limited to WooCommerce pages. You can also send users to custom URLs. That could be a landing page, a form, or anything else inside your site.
So if you’re running a WooCommerce store and want more control after login or logout, use redirection by role. It’s a simple way to give users the right experience based on who they are.
Installing the Redirect User After Login and Register Plugin
———————————-
Installing the Redirect User After Login and Register plugin is required before setting up any redirect rules. Follow these steps to install it on your WooCommerce store.
- Download the plugin ZIP file from your WooCommerce account
- Go to WordPress admin > Plugins > Add New
- Click Upload Plugin and choose the ZIP file
- Press Install Now then Activate the plugin
- After activation, go to WooCommerce > Redirect Rules to start setting it up
How to Set Role-Based Redirects in WooCommerce
———————————-
To set role-based redirects in WooCommerce, first make sure the plugin is active. Then go to the redirection settings to begin creating your rules.
- Go to WooCommerce > Redirect Rules
- Click the “Add New Redirect Rule” button
- Enter a name for the rule (for internal use)
- Select the redirection type – After Login, After Logout, or After Registration
- Choose “User Role” from the condition options
- Pick the user role you want to target (like Customer, Subscriber, etc.)
- Set the destination page or enter a custom URL
- Save the rule to apply it
Repeat the process if you need different redirects for different roles.
Redirecting Users After Registration, Login, and Logout
———————————-
Redirecting after each user action is necessary to control how visitors move across your WooCommerce store. With this plugin, you set different pages for login, logout, and registration separately. New users can go to an onboarding page right after they register. Logged-in users can be redirected to the dashboard, shop, or any page that supports store activity. After logout, users may land on the homepage, a sales page, or a custom URL set for exit traffic.
No custom code needed for setup. Everything can be handled through the plugin settings. These actions work with user roles too. That means customers, subscribers, and admins can all be redirected to different places depending on what makes the most sense for their role.
Here’s a quick guide to set up redirects for each action:
- Go to WooCommerce > Redirect Rules
- Create a new redirect rule or edit an existing one
- Select the redirection type: After Registration, After Login, or After Logout
- Choose user roles or specific users for the rule
- Set the destination page or input a custom URL
- Save the rule and test to confirm it works as expected
Managing Multiple Redirection Rules Efficiently
———————————-
Managing multiple redirection rules is important for stores with different user roles and varied redirect needs. This plugin allows you to create and organize many rules in one place. You can name each rule clearly to identify its purpose quickly. Rules can be enabled or disabled without deleting them, making it easy to test or pause redirects when needed.
Having multiple rules means you can target specific user groups with precise redirects. For example, customers can be sent to the shop page while vendors go to their dashboard. This organized setup saves time and avoids confusion when handling complex redirection scenarios. The plugin’s interface keeps all rules visible and manageable, so you can update or remove rules as your store changes.
Conclusion
The ability to set custom redirects after login, logout, or registration in WooCommerce is not just a convenience feature. It’s a necessary function for stores that deal with different types of customers, vendors, admins, or contributors. The WooCommerce redirect after login plugin from Extendons gives full control over where users land based on their actions and roles.
Whether it’s a customer who needs to go straight to the shop or a vendor heading to their dashboard, sending them to the right place saves time and confusion. It also helps store owners guide traffic in ways that matter most to their store’s flow.
The plugin allows redirection based on user roles, usernames, and specific actions like registration or logout. Admins can manage multiple rules, assign names to each rule, and disable or enable them without deleting. You can also set redirects to store pages or custom URLs, making it highly flexible.
For stores with multiple departments or role-based customer service flows, this becomes very useful. You don’t need custom code or developer help to set all of this. Everything is handled inside your WooCommerce settings through a dedicated redirect rule interface.
Apart from login redirection, WooCommerce offers thousands of other plugins for different use cases. Some plugins handle product customization, others allow quote requests or offer booking systems. Each one serves a specific need and can be stacked together to run a full-featured online store.
WooCommerce works because it allows store owners to pick the tools they need. There’s no single way to run an online store. What works for one shop may not work for another. The plugin structure of WooCommerce supports this variety. Whether it’s redirection, customization, or location finding, each plugin serves a targeted function. Together, they create a full system.
Store owners should explore these options, pick the ones that fit their business goals, and use them to fix problems, not just add features. Always choose plugins with regular updates, clear documentation, and strong compatibility with your theme and version of WooCommerce. That keeps your store reliable and secure long-term.


